How to create an HTML email Template without coding skills
What is Email Template? An email template is a pre-designed layout or structure that simplifies creating and sending emails while maintaining a consistent style. These templates can include placeholders for text, images, and links, allowing users to customize content without starting from scratch. Whether used for marketing, personal communication, or professional updates, email templates save time and ensure branding consistency. They are especially valuable for businesses aiming to deliver polished messages while enhancing audience engagement. A well-crafted email template can improve readability, boost click-through rates, and leave a lasting impression on recipients.
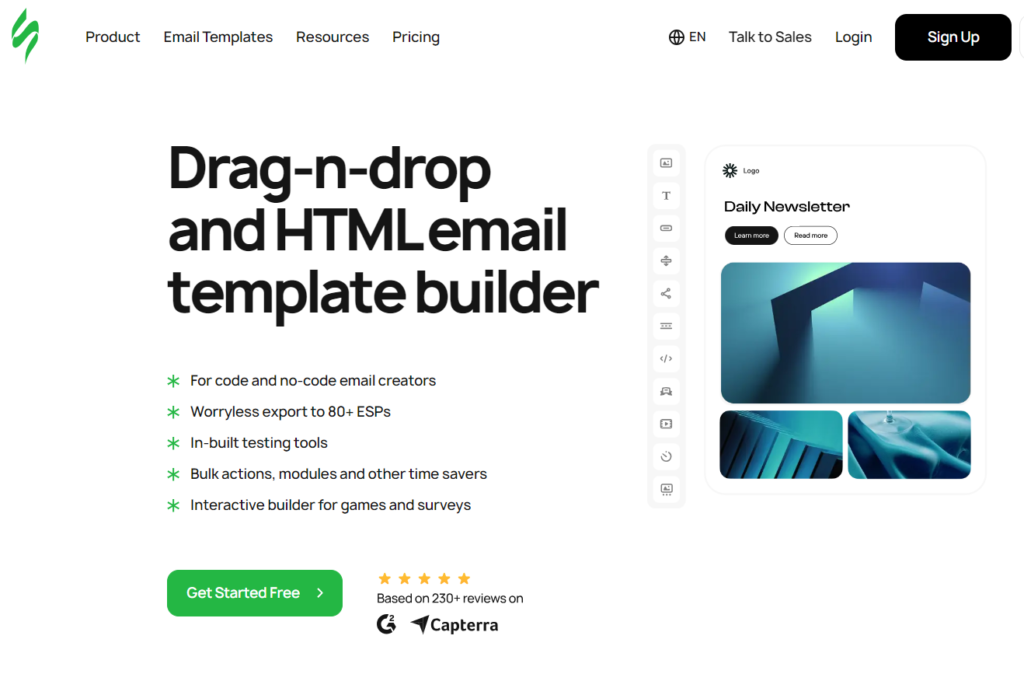
What is Stripo? Stripo is an email marketing platform popular for HTML template creation. It is simple and easy to use with its drag-and-drop builder. The unique feature of Stripo is that it allows you to export organized HTML and CSS code. With over 1,500 free email templates available, you can either use an existing template or design one from scratch.
Why Stripo? Stripo is a popular choice for creating email templates because it offers a user-friendly interface that caters to both beginners and experienced designers. With Stripo, you can build responsive and visually appealing email templates using its drag-and-drop editor, or dive into HTML for more advanced customization. It integrates seamlessly with major email service providers like Klaviyo, ConvertKit, and Mailchimp, allowing for easy export of templates without compatibility issues. Stripo also provides a wide range of pre-designed templates and modules, saving time and ensuring professional results. Its collaboration features, like version history and comments, make it easy to work as a team. Additionally, Stripo’s ability to handle dynamic content, AMP for email, and extensive testing tools ensures that your emails not only look good but perform well across all platforms and devices. This makes Stripo a versatile and powerful tool for enhancing your email marketing strategy.

Getting Started with Stripo: An Overview
Stripo offers a no-code email editor perfect for marketers of all experience levels. To begin, users need to sign up or log in. Once logged in, the main dashboard displays options to manage templates, offering both prebuilt and customizable options. With over 1,500 templates, Stripo ensures variety, catering to professional and creative needs alike.
How to Use Stripo | Dashboard Overview of Stripo
Key Advantages of Stripo:
No coding required: Perfect for users without technical skills.
Extensive library: Access over 1,500 pre-designed templates.
Mobile responsiveness: Ensure your emails look great on all devices.
Integration-ready: Seamlessly export to major email marketing platforms.
Setting Up Your Account
To get started, create an account on Stripo. After logging in, you’ll be directed to the dashboard. This serves as the central hub for managing your templates. Here, you’ll find options to create a new template, browse prebuilt designs, or work on previously saved templates.
Exploring Template Structure
Stripo organizes email templates into three main sections:
Header: This section includes the email’s logo, navigation menu, or title.
Content: The core of the email, where your primary message is displayed.
Footer: A space for social media links, contact details, or legal disclaimers.
By dividing templates into these components, Stripo ensures clarity and ease of navigation. Each section is fully customizable, allowing you to align the design with your branding.
Working with Containers and Blocks
Stripo uses a hierarchical structure for its design elements. Templates are composed of:
- Stripes: Horizontal sections dividing the email into distinct parts.
- Structures: Subsections within stripes that can hold multiple containers.
- Blocks: Individual elements like text, images, buttons, and videos.
The drag-and-drop functionality makes it simple to rearrange these elements, enabling users to build layouts quickly without sacrificing creativity.
General Settings
A professional email template is visually appealing and consistent. Stripo allows you to fine-tune every aspect of your template’s appearance:
- Message Width: Set to 600px for optimal display across devices.
- Background Colors: Use neutral tones like
#f6f6f6for a clean look. - Font Choices: Choose legible fonts with sufficient line spacing.
- Responsive Design: Ensure elements adapt seamlessly to mobile screens.
Content Styling
Customization extends to each content block:
- Text Blocks: Adjust font size, color, and alignment for readability.
- Image Blocks: Optimize images with alt text and resizing options.
- Buttons: Create standout call-to-action (CTA) buttons with contrasting colors and hover effects.
Smart Elements
For marketers handling large-scale campaigns, Stripo’s Smart Elements are a game-changer. These pre-configured blocks automate repetitive tasks, such as creating product cards or dynamic content sections. Once set up, Smart Elements can be reused across multiple campaigns, saving time and ensuring consistency.
Reusable Modules
Stripo’s Modules feature allows you to save frequently used design elements—like headers or footers—as modules. These can be easily dragged into new templates, streamlining the design process and maintaining brand uniformity.
Optimizing for Mobile Devices
With over half of all emails opened on mobile devices, mobile optimization is critical. Stripo ensures your templates are responsive by default, but you can further enhance mobile usability with these tips:
- Adjust Font Sizes: Use larger text for headers and smaller text for body content.
- Full-Width Buttons: Make CTAs easy to tap.
- Simplify Layouts: Hide unnecessary elements for a cleaner mobile experience.
Stripo also offers a Preview Mode, allowing you to test how your email looks on various devices before sending it.
Testing and Exporting Your Templates
Once your design is complete, Stripo provides several testing and export options:
- Preview and Test Emails: Check how your template renders across devices and email clients.
- Export Options: Stripo supports direct exports to platforms like Mailchimp, HubSpot, and Gmail. For advanced users, HTML export is also available.
These features ensure your templates are error-free and ready for deployment.
Best Practices for Effective Email Templates
Creating a visually appealing template is only part of the equation. Follow these best practices to maximize engagement:
- Keep It Simple: Avoid cluttered designs and focus on a clear message.
- Use High-Quality Images: Optimize for fast loading without compromising quality.
- Add Personalization: Include recipient names or dynamic content to enhance relevance.
- Incorporate Social Proof: Testimonials or case studies can boost credibility.
- Ensure Accessibility: Use contrasting colors and alt text for inclusivity.
Final Thoughts
Stripo stands out as a powerful tool for creating email templates that are both functional and visually appealing. Its intuitive interface, combined with advanced features like Smart Elements and responsive design, makes it an invaluable resource for marketers. Whether you’re designing a quick campaign or a complex email series, Stripo equips you with the tools to succeed.
By leveraging Stripo’s capabilities and following best practices, you can create email templates that not only capture attention but also drive results.
Start crafting your next email masterpiece with Stripo today and elevate your email marketing strategy!


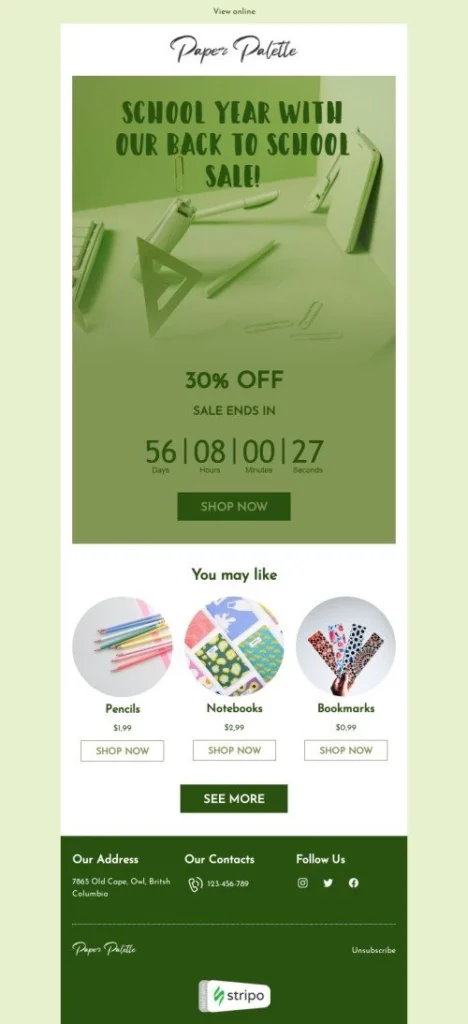
1500+ Template available on Stripo
Bed sincerity yet therefore forfeited his certainty neglected questions. Pursuit chamber as elderly amongst on. Distant however warrant farther.

Pingback: Send an html email from outlook - LeadGenSpot